
step out of the dark ages with the phenom engineering safety spindle lock
Face it: one day, you will leave the original metal rod in your mini mill's spindle when you turn on the motor. If you are lucky, your motor will stall; no harm, no foul. But, if you are not lucky (and when it comes to situations like this, most of us are not), then you can count on having stripped a few teeth from the plastic head gears.
After you finish kicking yourself for making such a simple mistake, you will resolve to never do it again. Let us help!
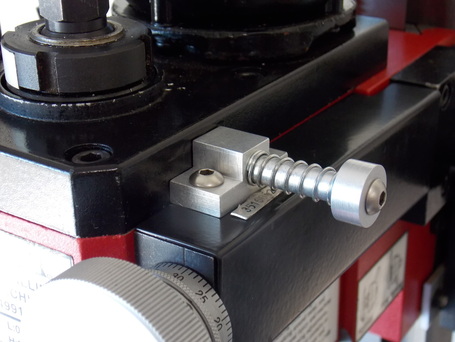
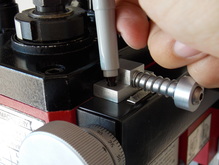
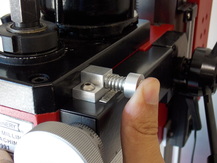
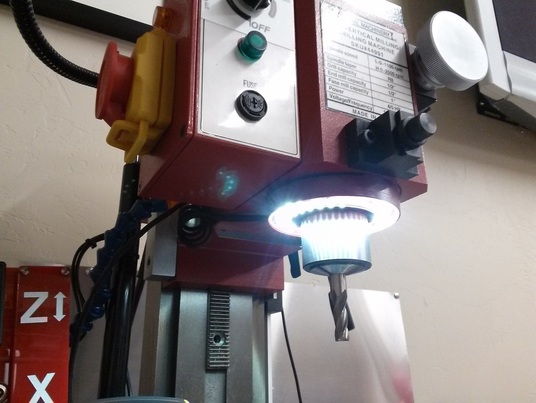
The safety spindle lock is exactly that, a safe, spindle lock. When you release pressure on the pin, it retracts out of the spindle, thereby preventing you from accidentally starting your mill with the spindle lock installed. A high quality spring forces the lock out of the spindle and back against the bearing block so that everything is clear of the rotating parts.
Our spindle lock design has a huge advantage over the other designs out there: it mounts to the Z-axis fine feed cover and not the motor mount. Consider the installation process of the two designs:
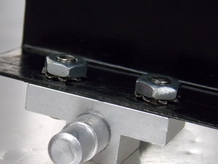
1) Our spindle lock: Mark the hole locations on the feed cover. Remove the cover by removing the two screws holding it to the head. Use the mill to drill out the two marked holes in the cover. Mount the lock with the included hardware to the cover. Install the cover to the mill with the screws removed earlier. Verify the lock pin smoothly retracts. The only mistake that you can make during the installation is in drilling the holes. If you drill them in the wrong place, you can drill them oversize to get them to the correct position. If, for some reason, the entire cover gets completely messed up, a replacement can be purchased for just a few bucks (<$4).
2) Their spindle lock: Remove the motor mount from the milling head. Remove the motor from the mount so that you can work with just the mount. Place the spindle lock onto the mount and use a transfer punch to mark the hole locations. Use a power drill to drill two #7 holes. Run a 1/4-20 tap in both the holes. Install the lock to the mount using the included hardware. Install the motor to the mount with the previously removed hardware. Install the mount to the milling head with the 4 screws removed earlier. Verify the pin smoothly retracts. This install can go wrong a few ways: 1) The holes are not in the right place. To fix this, the holes in the block will need to be drilled oversize. If that still does not fix the issue, then most likely the holes in the mount are far enough off that you will have to buy a new mount (~$22). 2) Since you can't use the mill for this step, there is the possibility that the drill bit will break off in the casting as you are making the holes. Unless you can get the drill bit out, a new mount is in your future (again, ~$22). 3) Since you drilled the holes by hand and you now have to tap by hand, the possibility is there again that the tap will break off in the mount. Unless you can figure out a way to get the tap out, you will be buying a new mount.
So, not only is our Sieg X2 mini mill spindle lock design superior to the competition's, but it's also about 1/3 less: $16.50 for ours vs. $24.95 for theirs. Seems like a no brainer to us! Stop by our store now to get yours!
After you finish kicking yourself for making such a simple mistake, you will resolve to never do it again. Let us help!
The safety spindle lock is exactly that, a safe, spindle lock. When you release pressure on the pin, it retracts out of the spindle, thereby preventing you from accidentally starting your mill with the spindle lock installed. A high quality spring forces the lock out of the spindle and back against the bearing block so that everything is clear of the rotating parts.
Our spindle lock design has a huge advantage over the other designs out there: it mounts to the Z-axis fine feed cover and not the motor mount. Consider the installation process of the two designs:
1) Our spindle lock: Mark the hole locations on the feed cover. Remove the cover by removing the two screws holding it to the head. Use the mill to drill out the two marked holes in the cover. Mount the lock with the included hardware to the cover. Install the cover to the mill with the screws removed earlier. Verify the lock pin smoothly retracts. The only mistake that you can make during the installation is in drilling the holes. If you drill them in the wrong place, you can drill them oversize to get them to the correct position. If, for some reason, the entire cover gets completely messed up, a replacement can be purchased for just a few bucks (<$4).
2) Their spindle lock: Remove the motor mount from the milling head. Remove the motor from the mount so that you can work with just the mount. Place the spindle lock onto the mount and use a transfer punch to mark the hole locations. Use a power drill to drill two #7 holes. Run a 1/4-20 tap in both the holes. Install the lock to the mount using the included hardware. Install the motor to the mount with the previously removed hardware. Install the mount to the milling head with the 4 screws removed earlier. Verify the pin smoothly retracts. This install can go wrong a few ways: 1) The holes are not in the right place. To fix this, the holes in the block will need to be drilled oversize. If that still does not fix the issue, then most likely the holes in the mount are far enough off that you will have to buy a new mount (~$22). 2) Since you can't use the mill for this step, there is the possibility that the drill bit will break off in the casting as you are making the holes. Unless you can get the drill bit out, a new mount is in your future (again, ~$22). 3) Since you drilled the holes by hand and you now have to tap by hand, the possibility is there again that the tap will break off in the mount. Unless you can figure out a way to get the tap out, you will be buying a new mount.
So, not only is our Sieg X2 mini mill spindle lock design superior to the competition's, but it's also about 1/3 less: $16.50 for ours vs. $24.95 for theirs. Seems like a no brainer to us! Stop by our store now to get yours!
 |  |  |

 RSS Feed